

How To Screenshot On Dell Windows Desktop
Exercise you need to take a screenshot? Once you find where the Print Screen key is on your Dell laptop or desktop, taking screenshots is every bit uncomplicated as pressing that key. We'll bear witness yous how to notice that key and use information technology to take screenshots.
Find the Print Screen cardinal on your Dell keyboard
On your Dell Windows reckoner 10, y'all don't need to employ a special utility to take screenshots. You tin use Windows built-in screenshot alternatives 10 to capture your screen. This ways pressing the Print Screen key on your keyboard.
RELATED: How to take a screenshot in Windows 10
On your Dell laptop or desktop, you volition find this Print Screen cardinal in the upper correct corner of the keyboard (side by side to the function keys).
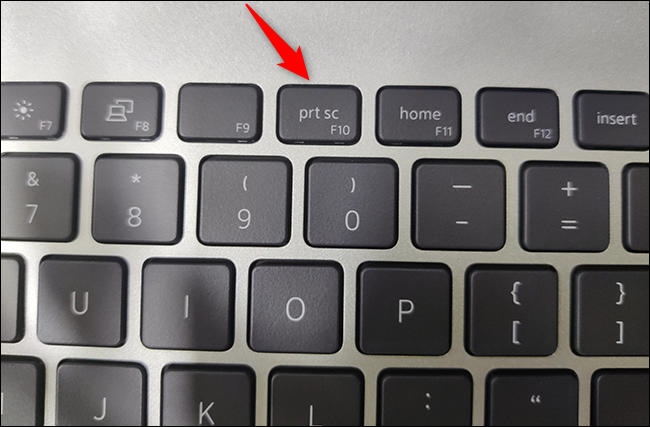
If it is not there, take a look at the function keys and you might find the key at that place. It is usually on the F10 central. In the event that yous don't see the key on your keyboard, use the Alt key combination + Insert in place.
Know that Dell uses multiple labels for the Print Screen primal. May exist labeled PrintScreen, PrntScrn, PrntScr, PrtScn, PrtScr, PrtSc or similar on your keyboard.
Take the screenshot on your Dell desktop or laptop
At present that you have constitute the Impress Screen key on your Dell PC, yous tin can utilize it to start taking screenshots.
RELATED: Using the new Windows screen capture tool 10: clips and annotations
Next, explains how to take screenshots in various means.
Take a screenshot and save it to the clipboard
To take the total screen shot of your screen and salve it to your clipboard, all you demand to do is press a central on your keyboard.
First, access the screen yous want to capture. While yous're on that screen, printing the Impress Screen key one time on your keyboard. This captures a screenshot of your entire screen and saves information technology to your clipboard.
To meet, open an epitome editor similar Paint and striking Ctrl + V to paste your screenshot.
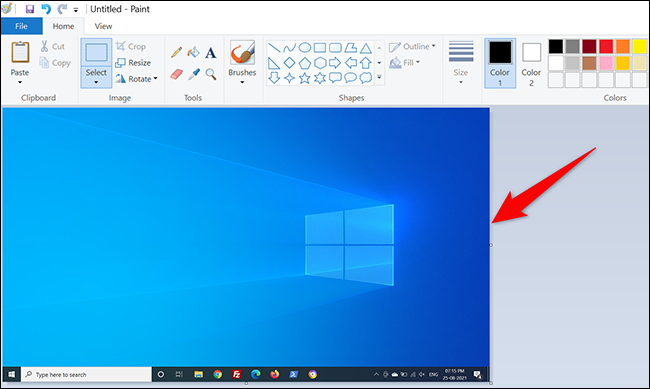
And that's it. Make certain to salve your screenshot before endmost the image editor app (Paint).
Take a screenshot and save information technology as a PNG file
To take a screenshot and salvage it directly as a PNG image file on your Dell computer, use an additional primal with the Impress Screen button.
First, open the screen you lot want to capture. On your keyboard, press Windows keys + Print screen at the same fourth dimension. This captures the screenshot of your screen and saves information technology as a PNG file.
This PNG file is in the side by side path of your PC. On the path below, supplant USERNAME with your ain username. Y'all tin alter the default folder to relieve the screenshot on your PC, If you wish.
C:UsersUSERNAMEPicturesScreenshots
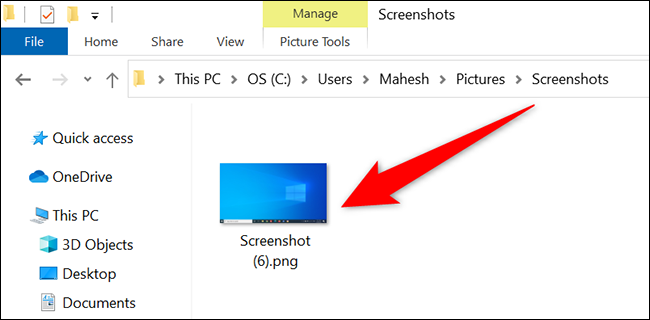
And this is how you lot neatly gather all your screenshots in a single folder.
Capture a screenshot of a specific window
Windows 10 makes it possible to accept a screenshot of a specific window on your PC, leaving the background out of the film.
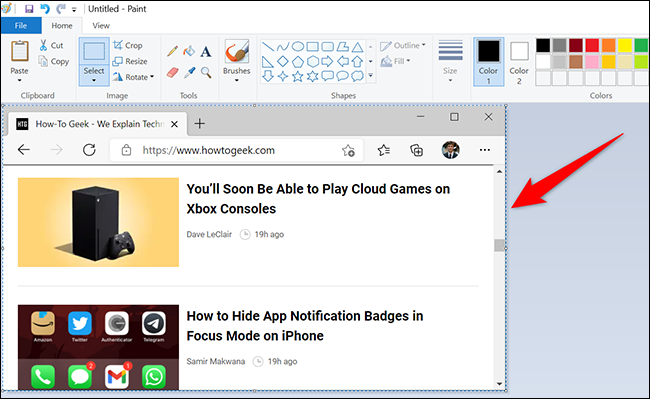
To practise that, commencement, open the window you want to capture.

On your keyboard, printing the Alt fundamental combination + Impress Screen. This takes the screenshot of your electric current window and saves information technology to your clipboard.
To run across your screenshot, start an prototype editor like Pigment and striking Ctrl + V in it. You will meet your screenshot.
And this is how yous take screenshots on your Dell motorcar. Very useful!
Did you know that y'all can have a screenshot without using a keyboard in Windows 10?
RELATED: How to have a screenshot of Windows 10 without a keyboard
Source: https://systempeaker.com/en/windows/windows-10/como-tomar-una-captura-de-pantalla-en-una-computadora-portatil-dell/
Posted by: chavisiont1981.blogspot.com
0 Response to "How To Screenshot On Dell Windows Desktop"
Post a Comment