

How To Download Netbeans With Jdk For Windows 10
07 May How to install NetBeans IDE on Windows 10
Posted at 21:03h in NetBeans one Annotate
NetBeans is a gratis and open up source Integrate Development Surround (IDE) and governed by the Apache Software Foundation. Develop desktop, mobile, and web applications with Java, JavaScript, HTML5, PHP, C/C++, etc easily with NetBeans. Here, nosotros will be installing NetBeans IDE.
In this tutorial, we will learn how to install NetBeans IDE on Windows 10. Java installation is also necessary since NetBeans is a Java based IDE, therefore nosotros will also run across JAVA JDK 13 installation while installing NetBeans IDE with text likewise as video tutorial below:
Following steps nosotros will follow to install NetBeans IDE on Windows 10:
- Download and Install Coffee thirteen
- Download NetBeans
- Installing NetBeans IDE
- Set NetBeans and Coffee path
- Launch NetBeans later installation
- Cheque the Video Tutorial as well
Let's begin with the installation:
Stride 1: Download and Install Java 13
Java thirteen released on September 17th, 2019. With that, the need of its usage is scaling high these days. In this article, we will see how to install Java JDK xiii on Windows 10 Os. With that, to avoid any hassles in time to come, we will besides permit you know how to verify the installation.
Permit the states now Download Java JDK 13
To download Java 13, go to Oracle's official website and type "JAVA JDK 13" in the search box as in the below screenshot:
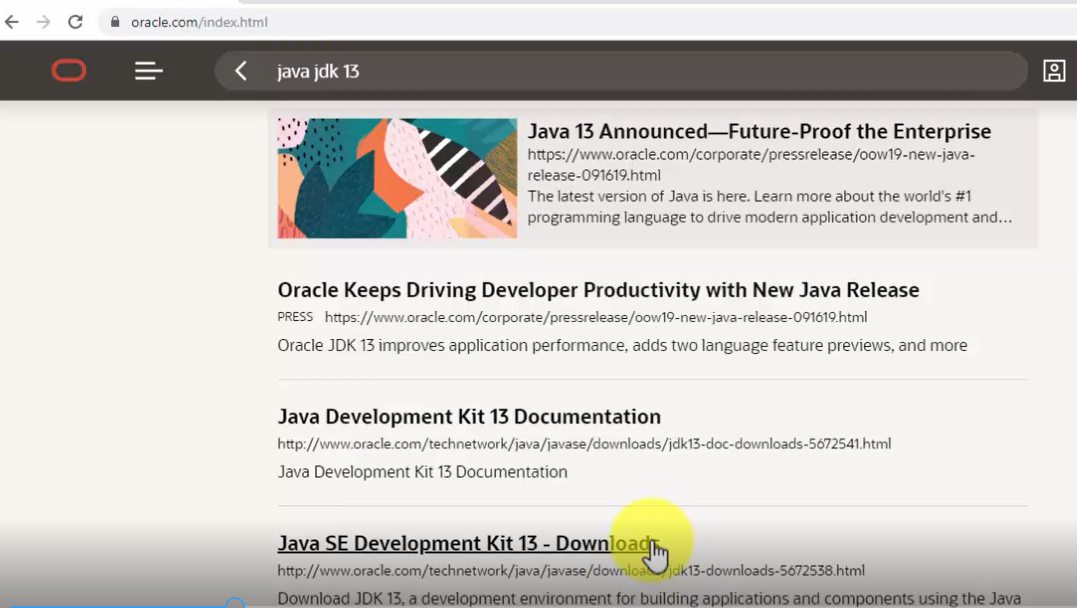
Now, click "Coffee SE Development Kit 13 – Downloads" and you volition attain the Downloads section:

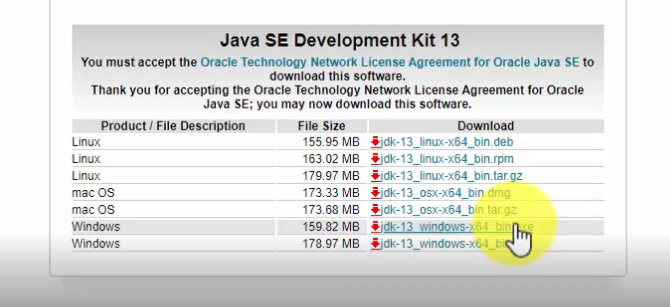
Go to lesser of the same folio, click "Accept" in that location itself:
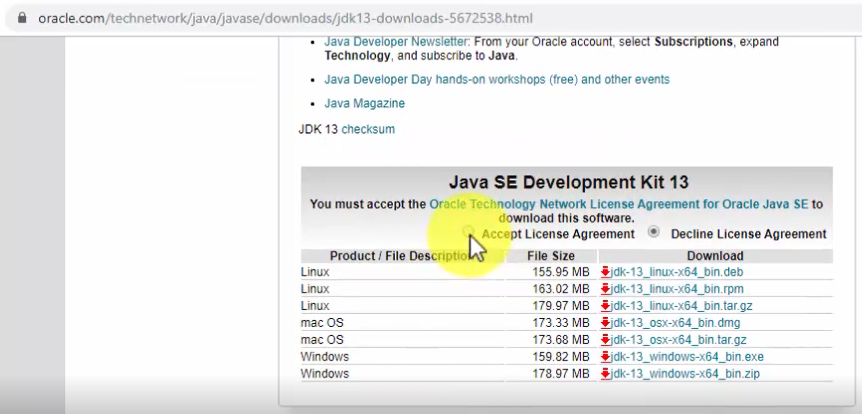
Since, nosotros are on a Windows 10 organisation, therefore, nosotros now take ii options. From that, nosotros will get with the installer exe 64-bit file i.e. jdk-13_windows-x64_bin.exe:
Annotation: Coffee JDK thirteen will go installed only on a 64-bit Windows 10 arrangement
As y'all tin can run across on the bottom-left of the web browser, the download begins. But await for few minutes till the download finishes:
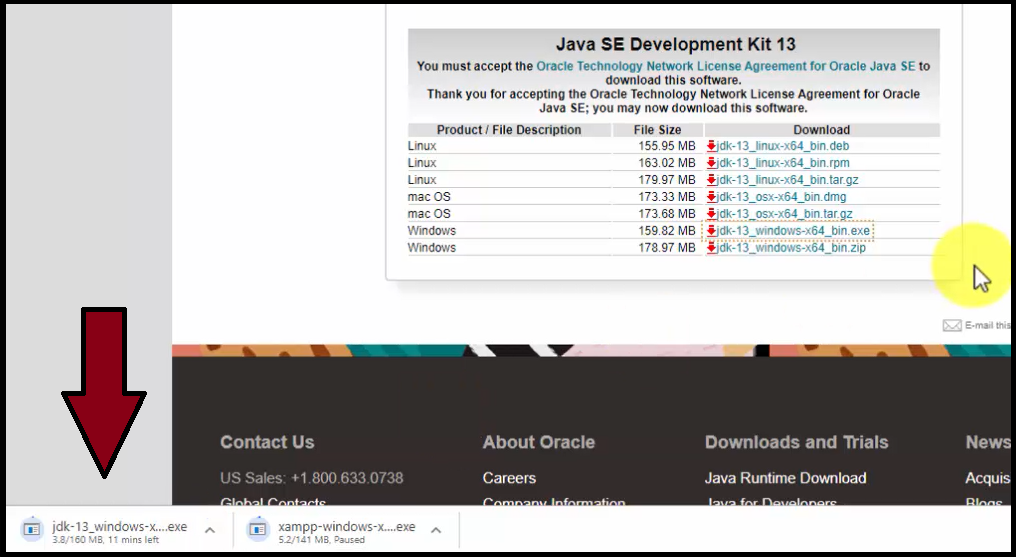
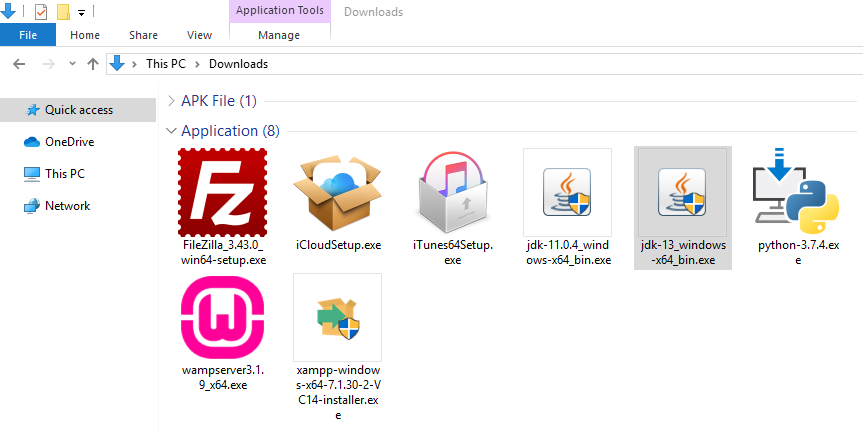
The downloaded jdk exe file volition become saved in the "Downloads" folder:
Now, become to "Downloads" folder on your Windows 10 system and double click on the "jdk-13_windows-x64_bin.exe" file:
Double click on the exe file and the installation begins:
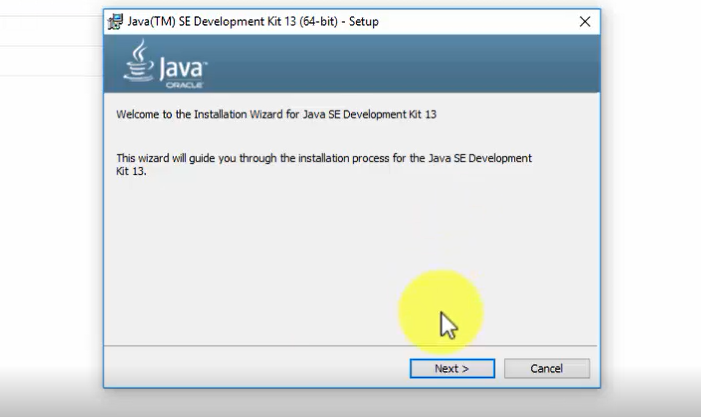
Click on "Side by side" higher up and set the path wherein the Java 13 will get installed. You can as well go on information technology the default:
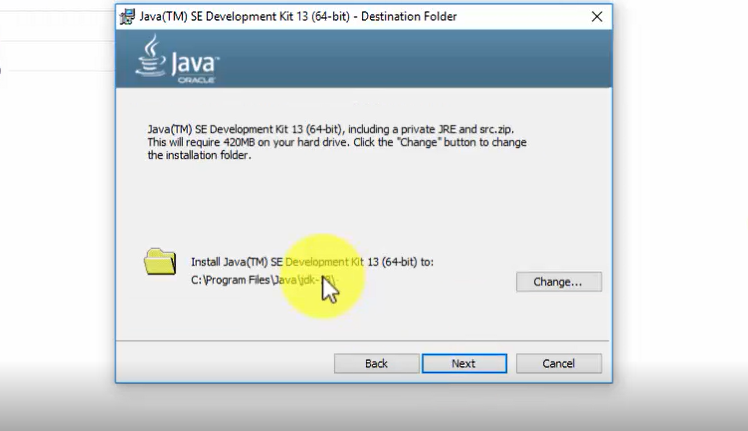
Click on "Next" above and the installation continues for some minutes.
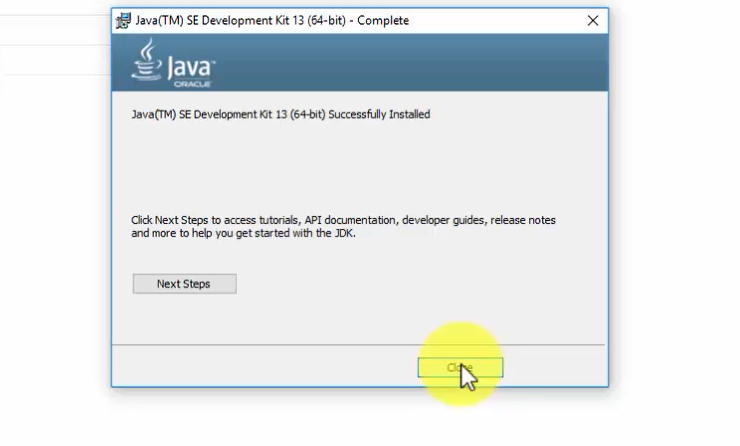
The installation finishes as in the following screenshot. Click on "Close":
Now, let us set up the JDK path.
Now, nosotros will see how to set Java JDK Path (Environment Variable).
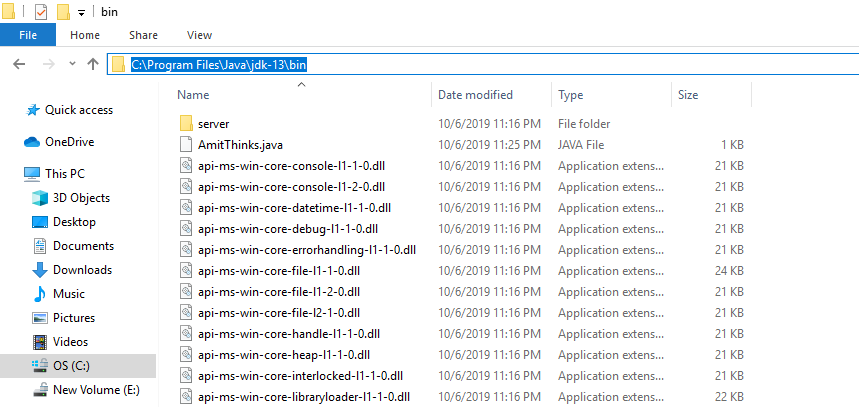
At first, copy the path wherein you installed the Java JDK. Let us copy information technology commencement. Remember, we need to re-create the bin path i.eastward. the following on our system:
| C : \ Plan Files \ Java \ jdk-13 \ bin |
Here's the screenshot of the "bin" path, wherein we installed Coffee xiii:
To set JDK Path, the easiest style is to blazon "Environs Variables" on Beginning. On typing, the following would be visible:
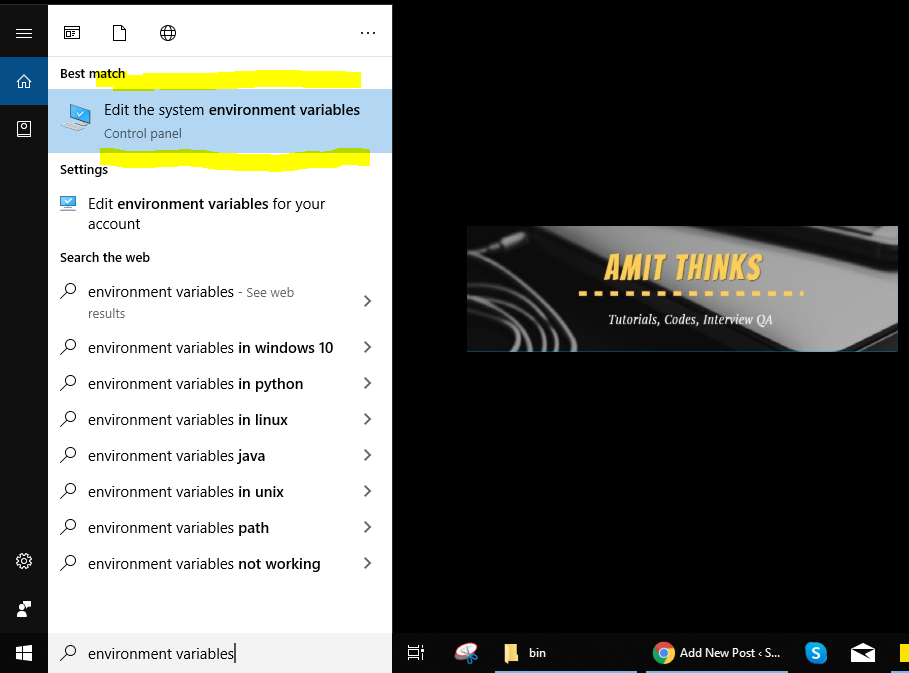
Now, click on "Edit Environment Variables" and a new dialog box would be visible:
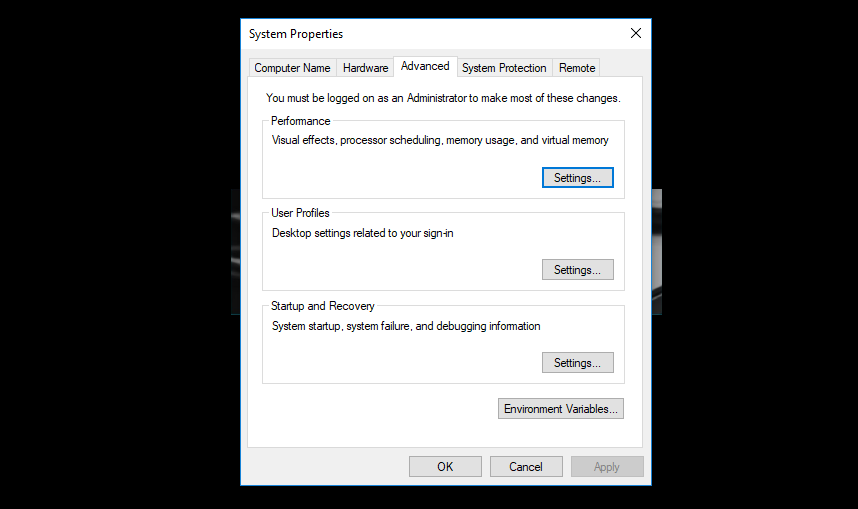
Now, click "Environment Variable" and a new dialog box will open up. Go to "Organization Variables" department and double click "Path" every bit in the below screenshot:
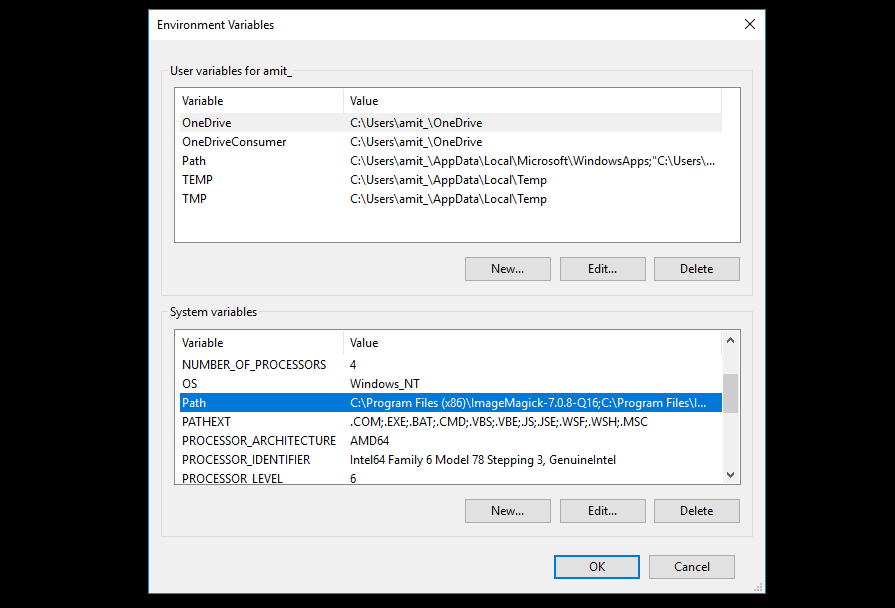
On clicking "Path", a new dialog box will open. From there, click "New" and add the Java JDK path "C:\Plan Files\Java\jdk-thirteen\bin" as displayed in the below screenshot:
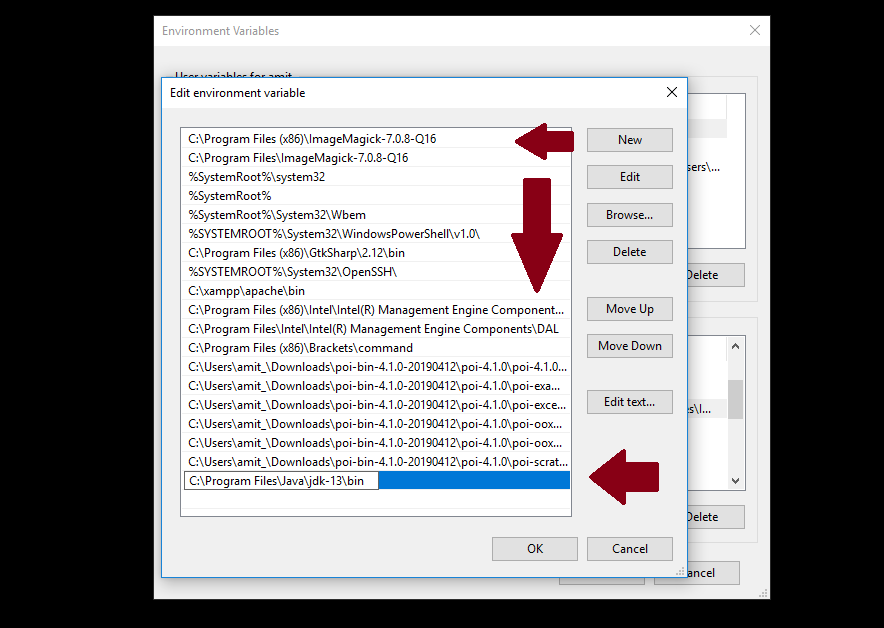
Above, printing Ok for all the dialog boxes i.east. 3 times. This ends the installation and the procedure to fix path for JDK. Now, nosotros will verify the JDK installation.
Now, we will verify Java JDK 13 Installation.
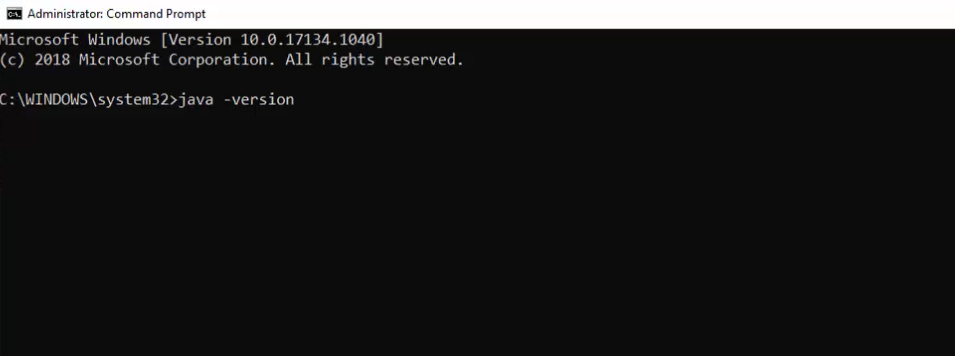
We saw how to install Java JDK 13 above. Nosotros installed on Windows 10 OS. At present, nosotros tin can easily verify whether the installation was successfully or not using the post-obit command:
Let us implement the above control on command prompt (cmd) and verify Java installation:
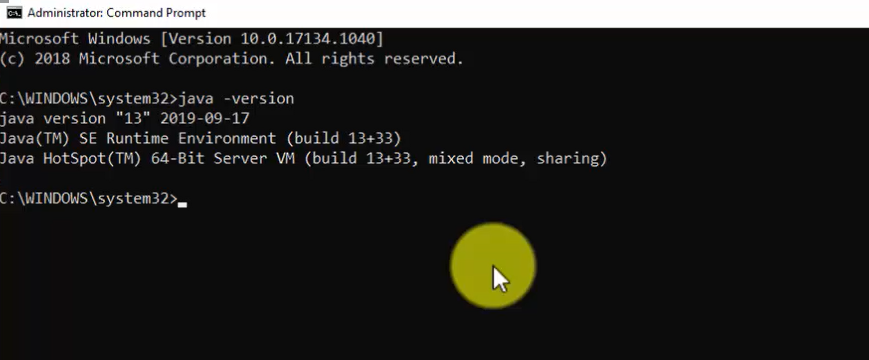
Therefore, the installation verification is now complete and successful since at present nosotros tin can see the version in the command prompt:
If you'd like to watching a video for installing Java 13 on Windows 10:
Step 2: Download NetBeans IDE
We installed Coffee above for NetBeans. Now, to install NetBeans IDE on Windows ten, at first we will download NetBeans IDE.
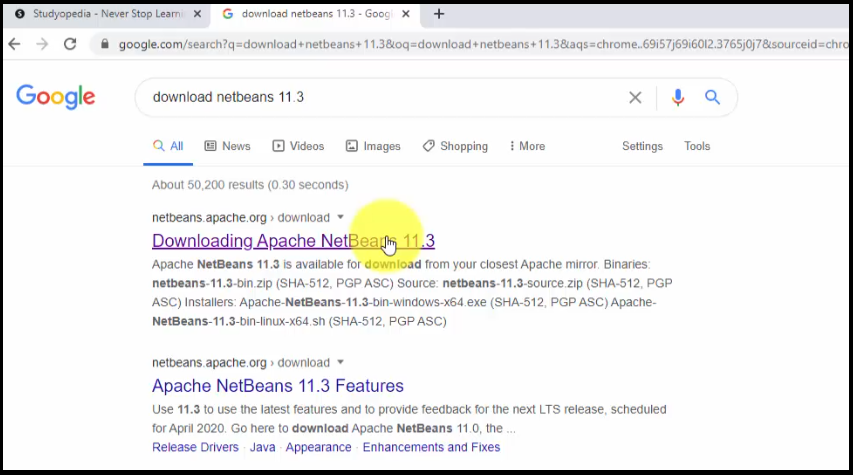
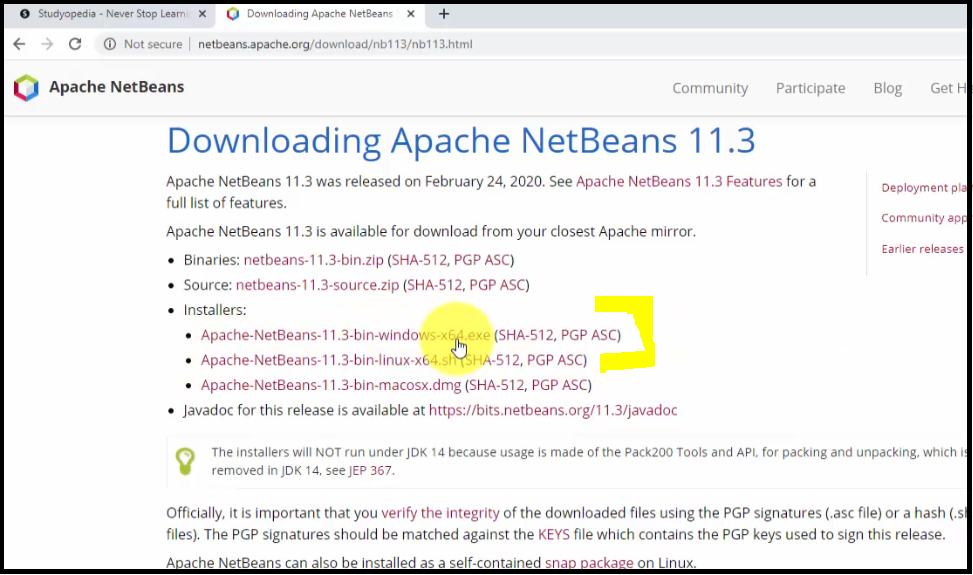
Go to Google and type Download NetBeans IDE 11.3. On typing, the official website of NetBeans i.e. "netbeans.apache.org" would exist visible on the peak of search results. Click on the website to download NetBeans as in the below screenshot:
Now, the official website will open. Click on the Windows exe file i.e. "Apache-NetBeans-11.3-bin-windows-x64" file since we have to install NetBeans IDE on Windows 10:
Now, you will be redirected to mirror sites. Click on any of them to download NetBeans IDE. We click the first one and the Download started equally in the below screenshot. The Download condition would be visible on the bottom left of Chrome web browser. When the download ends, right click to achieve the folder where information technology installed. We accept fix the default for Google Chrome downloads to the "Downloads" folder:

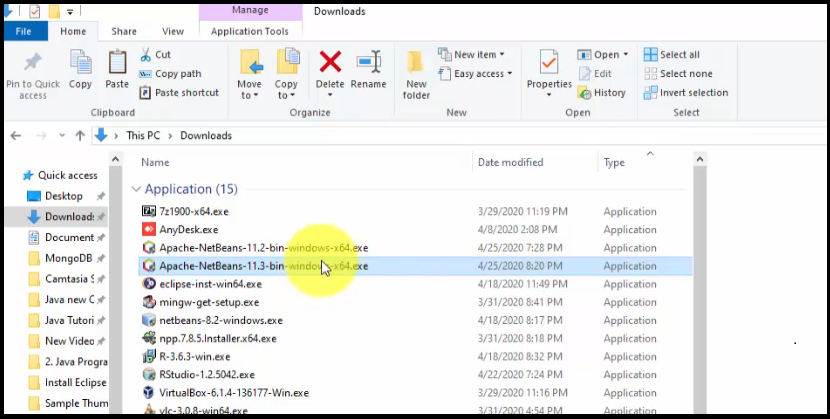
NetBeans installed successfully nether "Downloads" binder through Google Chrome as in the below screenshot. Locate the exe file of NetBeans: "Apache-NetBeans-11.three-bin-windows-x64" file:
Now, permit the states movement to Step three and brainstorm installing NetBeans.
Step 3: Installing NetBeans IDE
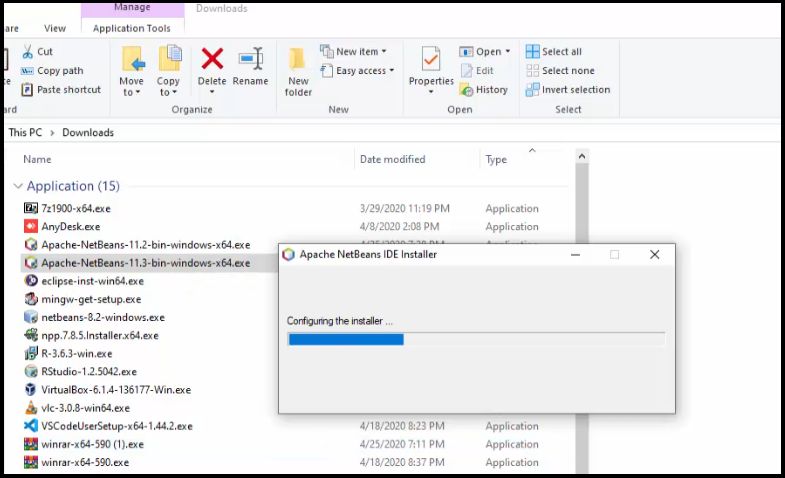
Now, we volition be installing NetBeans IDE. Double click the exe file we downloaded in Step2 and the installation begins every bit in the beneath screenshot:
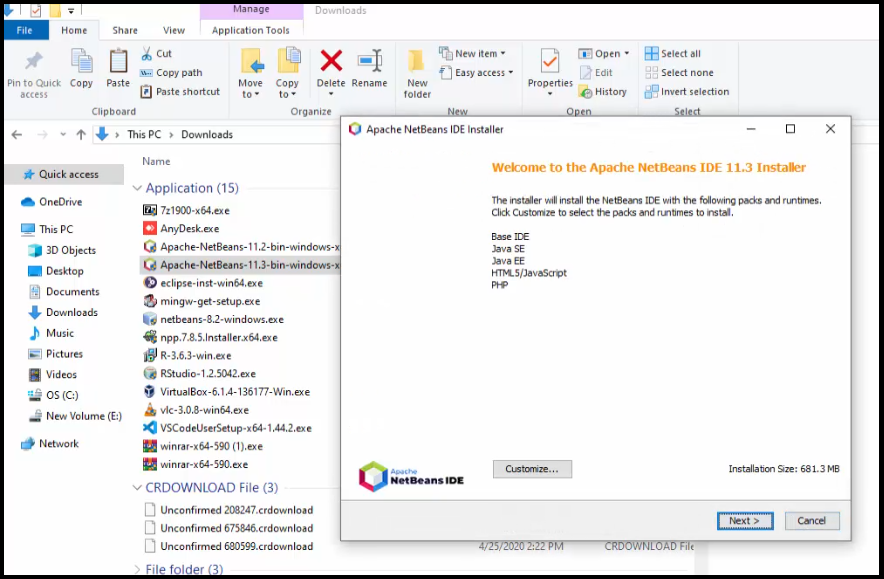
Now, you will reach the following installation dialog box (NetBeans Installer) showing what all will get installed with the installer size.
Note: You may go NetBeans installation fault here. Practise not worry, check our tutorial to ready NetBeans installation error.
Click "Next" to proceed:
At present, let us motion to Step four and set the path.
Step four: Set NetBeans and Java path
At present, set the path for NetBeans i.e. where you desire to install information technology. We volition keep the default i.e. nether Plan Files we will fix the NetBeans path. Post-obit is the path:
| C : \ Program Files \ NetBeans-11.3 |
Here, you can also run into we need to fix the path for Java JDK installation. This is the reason why nosotros demand to install Java before installing NetBeans IDE. Set the same path we saw under step one above while Installing Coffee i.due east. he following Java path:
| C : \ Program Files \ Java \ jdk-13 |
Screenshot shows the same paths:

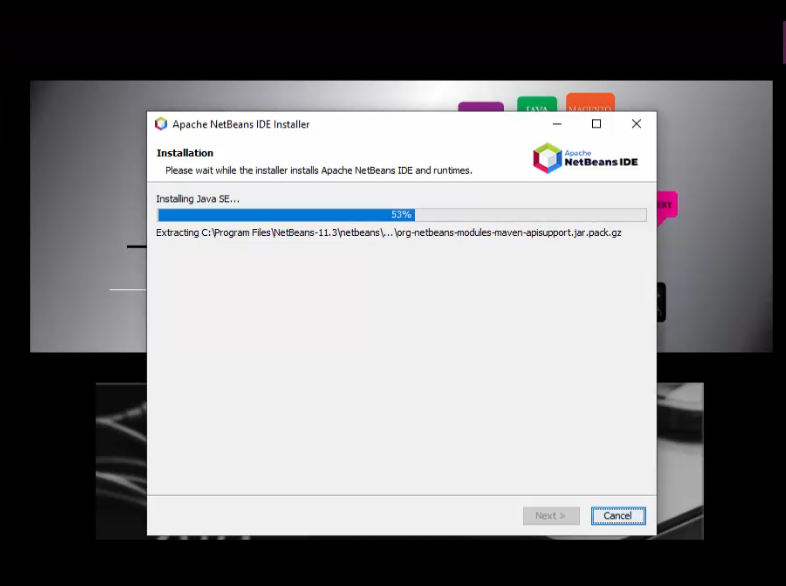
Later, that click "Next" and the installation continues. Now, the summary of installer is visible. Click on "Install" every bit in the below screenshot:

Now, installation continues. This is the final step:
Installation completed successfully and Desktop Shortcut created as in the below screenshot:
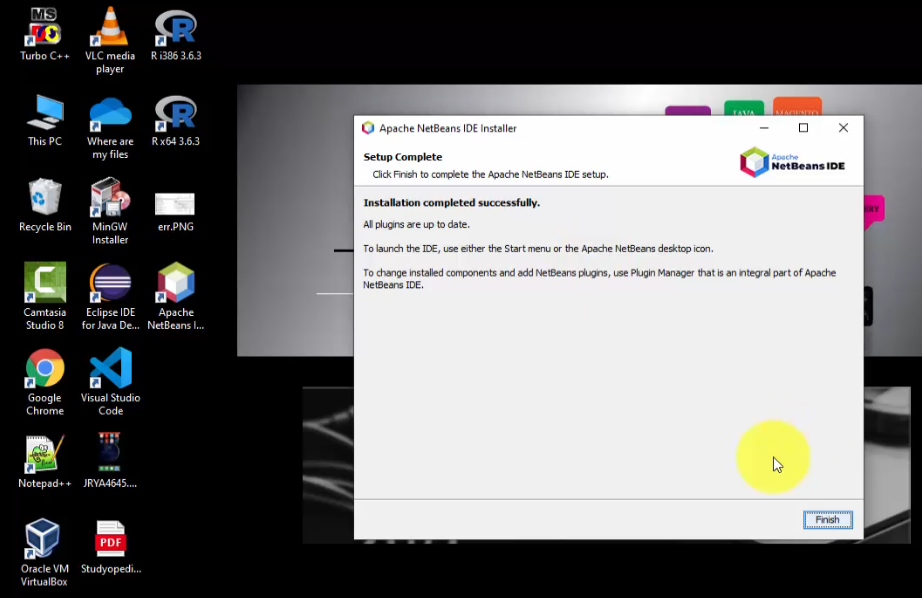
Click "End" above to close the dialog box.
Step 5: Launch NetBeans later on installation
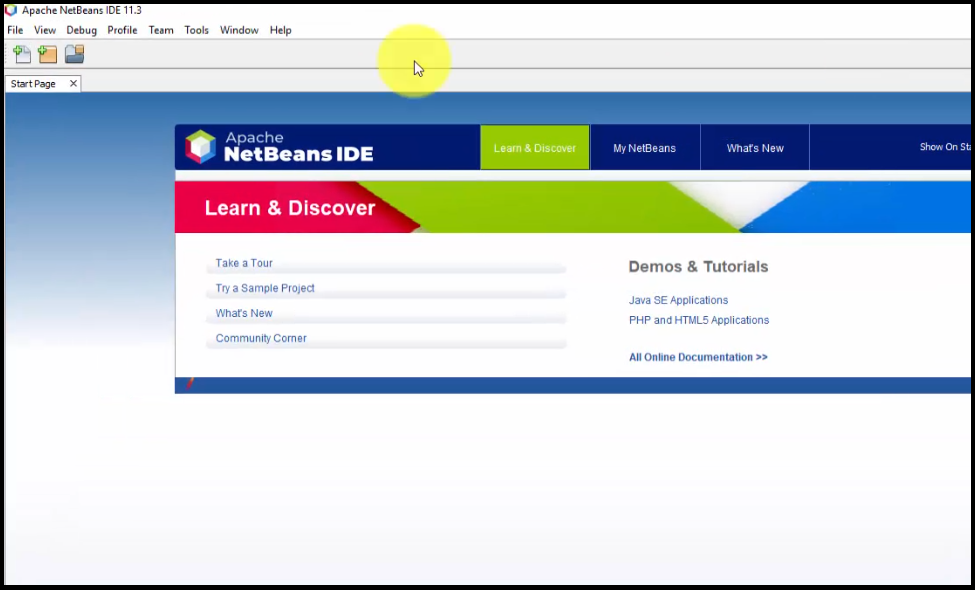
After that, click the "Desktop Shortcut" to launch NetBeans as in the beneath screenshot:

NetBeans opened successfully for the commencement fourth dimension later installation as in the below screenshot:
In this article, we saw how to install NetBeans on Windows 10 after installing Java. While installing, we also set the Coffee path.
Video Tutorial to Install NetBeans on Windows 10
Post-obit is the video tutorial displaying how to install NetBeans IDE on Windows 10. Covers the steps shown in the to a higher place text tutorial:
If you liked the NetBeans tutorial, spread the word and share the link and our website Studyopedia with others.
Support the states:DONATE
Read More than:
-
- Install Java fourteen on Windows 1o
- Install Python three.8.two on Windows 10
- Run your kickoff PHP program on XAMPP Server
- Install WordPress on localhost in Windows 10
- Install Drupal on localhost in Windows x
- Install Joomla on localhost in Windows x
- Install Python on Windows 10
- Install jQuery on localhost in Windows 10
- Install Eclipse on Windows x
Source: https://studyopedia.com/netbeans/installing-netbeans-ide-windows-10/
Posted by: chavisiont1981.blogspot.com
0 Response to "How To Download Netbeans With Jdk For Windows 10"
Post a Comment